How to navigate the Cargobase Dashboard?
The Cargobase Dashboard is a centralized page offering real-time insights into logistics operations, featuring widgets and tools for efficient management of shipments, quotes, invoices, and approvals.
The Cargobase Dashboard is designed to provide a tailored experience through standard widgets, allowing users to efficiently monitor relevant data.

Status Bar
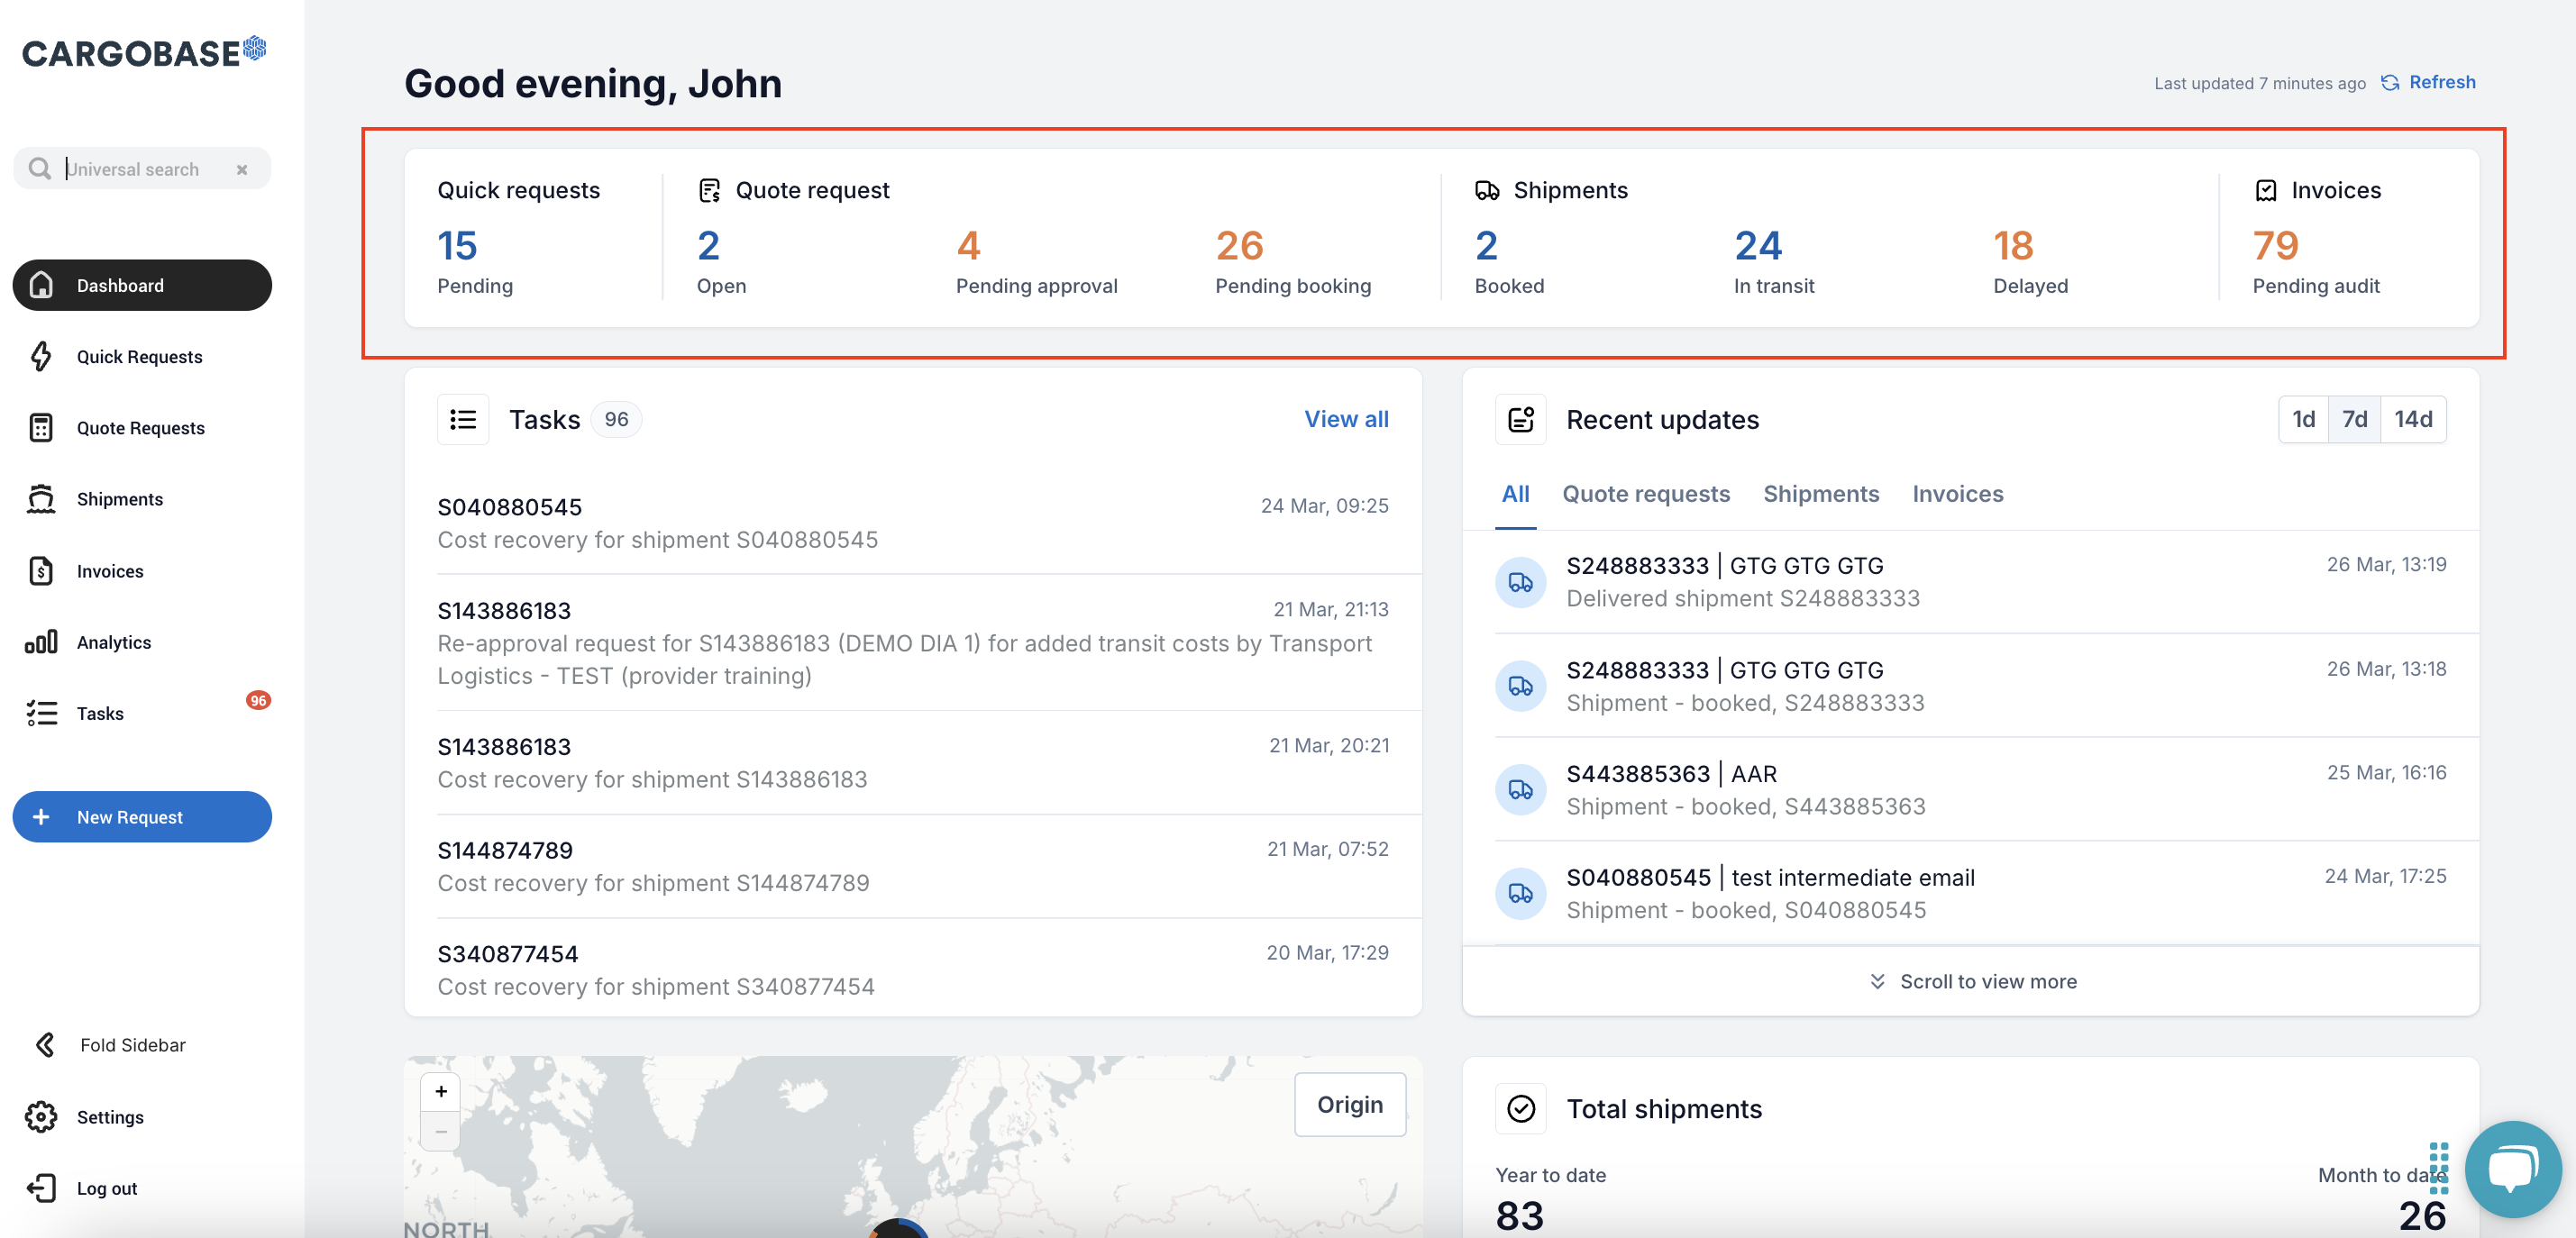
The Status bar provides a real-time overview of shipment activities, displaying key metrics based on the user's role and permissions. This ensures that each user sees only the relevant data necessary for their responsibilities.
Quick Requests:
- Pending: Requests pending for conversion to Quote Request.
- Open: Requests open for Providers to quote.
- Pending Approval: Requests pending for approval.
- Pending Booking: Awaiting the shipper to book a quote that has already been submitted by the provider.
- Booked: Shipments that are booked with a future pickup date.
- In transit: Shipments with a past pick up date.
- Delayed: Shipments with a scheduled delivery date that passed 5 days.
Invoices:
- Pending audit: Provider invoices that need to be audited.

Tasks (available for Shippers only)
The Tasks section provides a quick summary of action items from Task, helping users stay on top of pending tasks that require attention.
- Summary of Tasks: Displays the total number of open tasks.
- "View All": Allows users to navigate directly to Task for a complete list of tasks.
- Tasks include: approval request for bookings, cost recovery actions and re-approval for in transit costs.
- Select a Task notification to work on it.

Recent Updates
The Recent Updates section is a combined notification summary that helps users track important updates across different sections of the platform.
Date-Time Filter: Allows users to filter notifications based on the desired time range:
- Last 1 day
- Last 7 days
- Last 14 days
Categorized Updates: Notifications are split into four sections for easier tracking:
- All: Displays all recent notifications.
- Quotes Requests: Shows updates related to quote requests and submissions.
- Shipments: Highlights shipment-related notifications, including status changes and delays.
- Invoices: Displays invoice-related updates, such as pending approvals or audit status.
Total Shipments
The Total Shipments section provides a Month-To-Date & Year-To-Date overview of booked shipments, helping users track shipment volume trends over time.
- Monthly Breakdown: Displays the number of booked shipments for each month of the current year.
- Year-to-Date: Helps users compare shipment trends from January to the current date.
- Data Visualization: Presented as a bar graph for easy analysis.

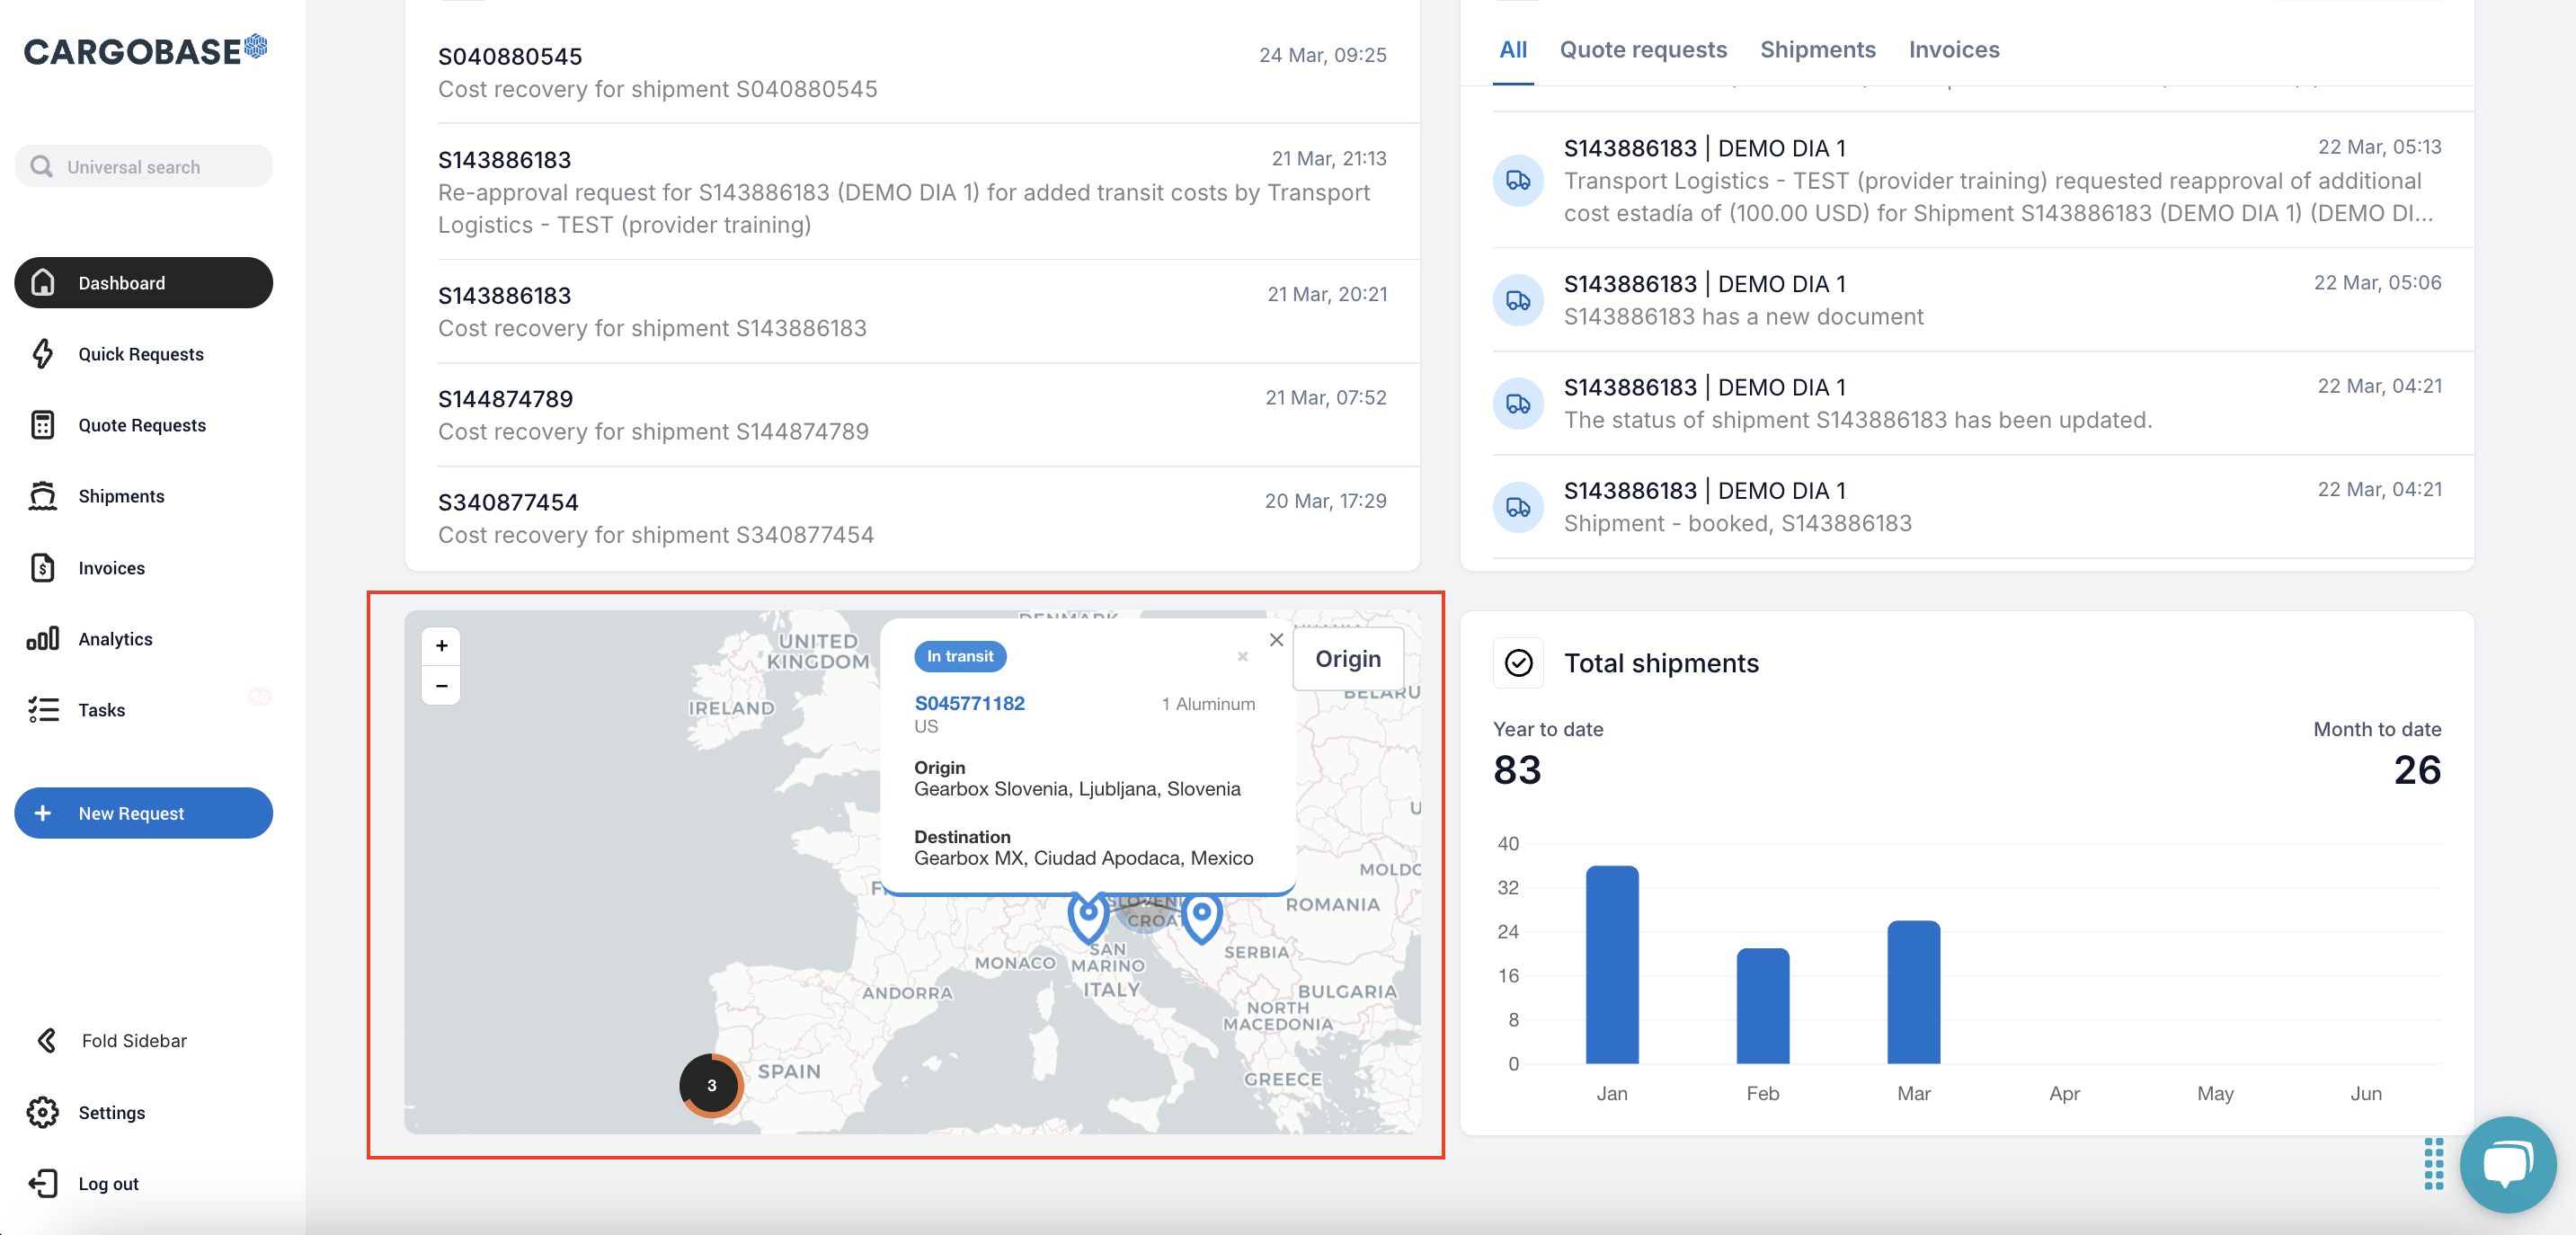
Map
- Click the toggle on the map to change the view and adjust the displayed shipment data as needed.
- Origin: the map will show the origin location of active shipments.
- Destination: the map will show the destination location of active shipments.
- The numbers on map indicate the total active shipments requested from origin and destination, depending on the map view.
-
To enhance visibility, the dashboard map uses color-coded indicators to represent different shipment statuses:
-
Black: Booked – The shipment has been scheduled but has not been picked up.
-
Blue: In Transit – The shipment is on the way to its destination.
- Orange: Delayed – The shipment is currently delayed.
-

