How to create a quick request?
Create a request for the logistics team to execute.
To start creating a quick request, click ![]() [the + icon] on the left side bar.
[the + icon] on the left side bar.
Complete the fields requested in each section of the page:
- Organisation
- Schedule (Pickup and Delivery)
- Packing List
- Service
- Confirmation
Fields and sections with a red asterisk (*) are mandatory entries.
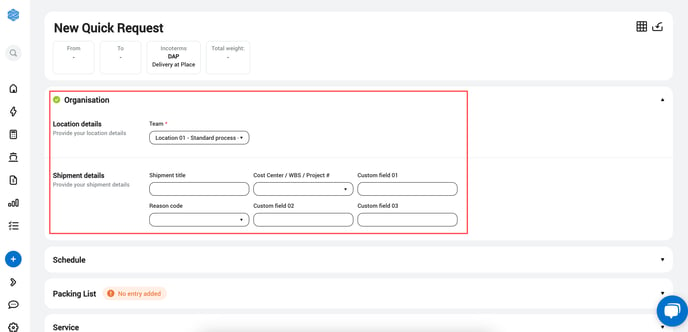
1. Organisation
- Select a Team or a Location to associate the request with.
- Fill in or select the shipment details.
Fields titles and drop down lists are configured for the account by the admin user of your company.
2. Schedule (Pickup and Delivery)
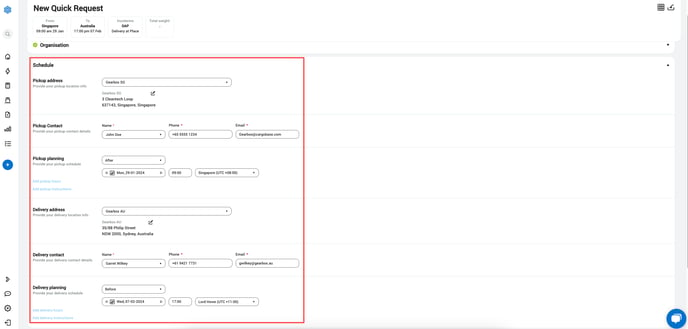
- Create or select a pickup address and a delivery address:
There are 3 options to select from:
-
- Address
Pickup at the door of the origin address.
Delivery at the door of the destination address. - Airport
Pickup at the airport of origin / airport of loading.
Delivery at the airport of destination / airport of discharge.
IATA: International Air Transport Association
- Address
-
- Port
Pickup at the port of origin / port of loading.
Delivery at the port of destination / port of discharge.
- Port
To search for the airport or port name, use the IATA code (e.g. USLGB) or the city full name. Once found, the country and the city names will be populated automatically.
Click Add manual address if an address is not found or needs to be adjusted.
New address entries are saved automatically to be used again in future requests.
- Create or select a pickup contact and a delivery contact:
The name, the email and the phone number of a person may be entered when required for the arrangement the pickup and delivery operations.
For parcel shipments, all contact details are mandatory entries.
- Create the pickup and delivery planning.
- Pickup planning:
After: defines the requested pickup date / cargo ready date.
Between: defines the pickup availability in date window.
-
- Delivery planning:
Before: defines the requested delivery date.
Between: defines the requested delivery in a date window.
Click Add pick hours and Add delivery hours to specify a time window.
Click Add pick instructions and Add delivery instructions to enter additional information.
3. Packing List
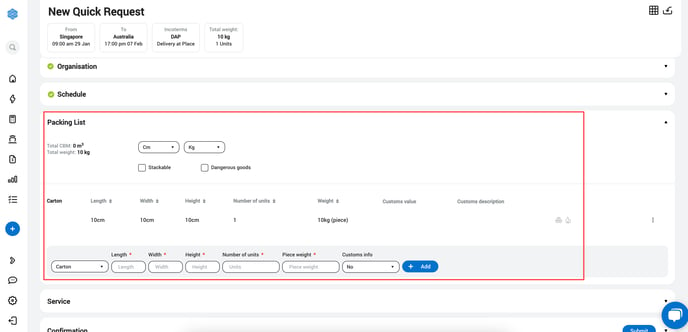
- Select units of measurement:
- Dimensions: centimeters (Cm) or inches (In)
- Weight: kilograms (Kg) or pounds (Lbs)
- Define specifications:
Tick the box to apply a specification and select a value from the list when required (E.g. Dangerous goods class, temperature band, etc.).
Packing list specifications are configured for the account by the admin user of your company.
- Create the list of packages:
- Select the type of package from the list (E.g. box, pallet, container).
- Fill in the dimensions per unit in Cm or In (Length x Width x Height).
- Fill in the weight per unit in Kg or Lbs.
- Fill in the customs information (Optional).
Click Yes, via file to add customs information from a file.
For parcel shipments, all customs information are mandatory entries.
- Click + Add to add the package details to the packing list.
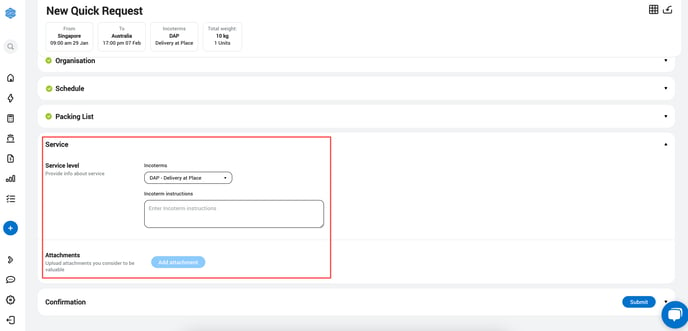
4. Service
- Select an Incoterm from the list.
- Fill in an Incoterm instruction (E.g. Name of the Place).
- Click Add attachment to upload files (Optional)
- Supported file format: pdf, xlsx, csv, png, jpg, pptx, docx
5. Confirmation
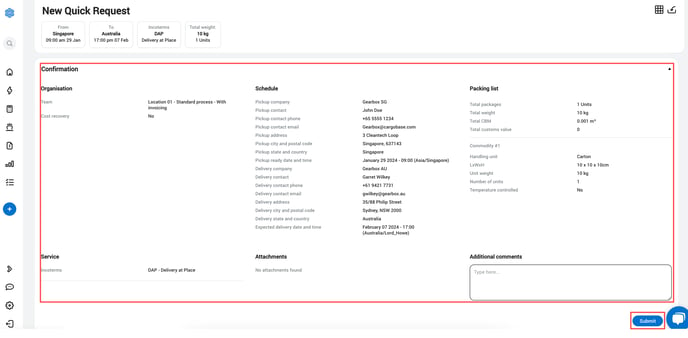
- Review the details entered.
- Insert Additional comments if required.
- Click Submit to complete the request creation.
What's next?
Upon submission, users in the logistics team receive an email notification about the newly created request. The email contains a link redirecting to the Cargobase platform for the user to view the details and convert the quick request into a quote request.
