A "user" is an account that has access to the Cargobase platform. Users can have different "roles", such a as manager or regular user, and a user can have a difference in approval level or other features.
Admin users are allowed to view and customize your company details such as:
- Company Details
- Team Members
- User Roles
- Payment Locations
- Providers
- Approval Levels
- Prefills
- Rate Cards
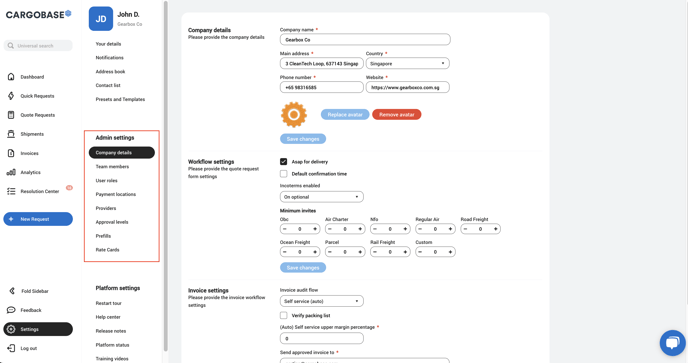
Company Details
At Company Details, you can update information such as your company details, workflow settings, and invoice settings.
- Company Details: You can update the company details such as the phone number, website, address, and logo.
- Workflow Settings: You can update details such as the Incoterms information and edit the minimum invitation parameters for each freight mode.
- Invoice settings: You can update the invoice workflow.
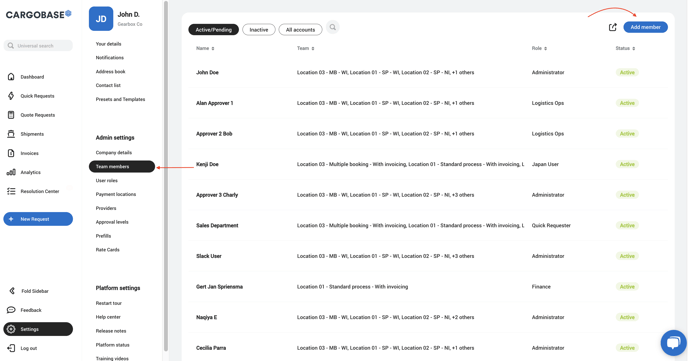
Team Members
At Team Members, you can validate the status of all the users, by checking if they are active, inactive or pending to activate the account.
- Click
 to download detailed user information in an Excel sheet.
 - Click Add member to invite a user on the platform.
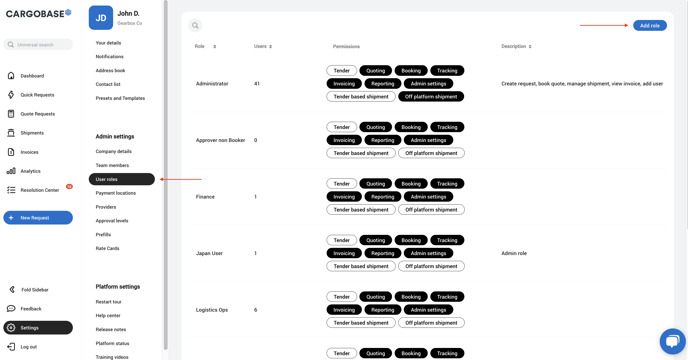
User Roles
Manage the access for different user types.
- Select any roles to edit the Permissions, you only have to check and uncheck permission to a user role to update it.
Changes which you make to a user role will activate to all users in that particular role instantly.
- Click Add Role at the top right to create a new role/type of user.
Admin Settings, allows users to control the account set-up, and should be assigned with care.
Adding an existing user to a new user role will remove them from the previous user role.
- Click Delete to remove a particular User Role.
Deleting a user role can create issues for the users in that particular role. Be sure to assign the users to a different role first before deleting a user role.
Payment Locations
Admin users can see the Payment Locations information and also has access to edit or add new payment locations to the account.
How to edit Payment Locations?
- Click Payment Locations and select any payment location to edit the details.
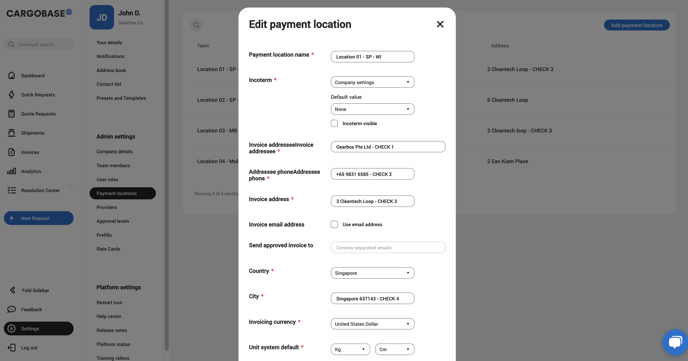
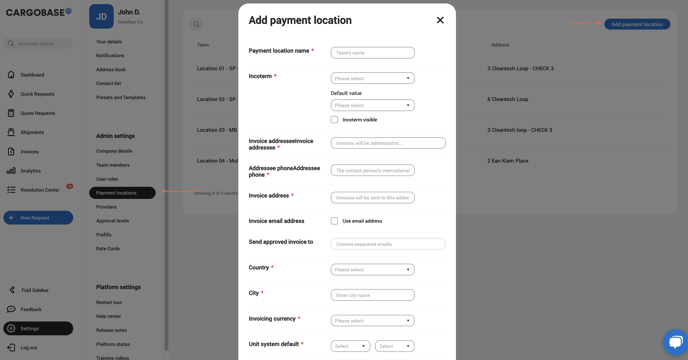
How to Add Payment Locations?
- Click Payment Locations and Add Payment Location at the top right, to create a new payment location.
- Complete the information for this new payment location and Submit.
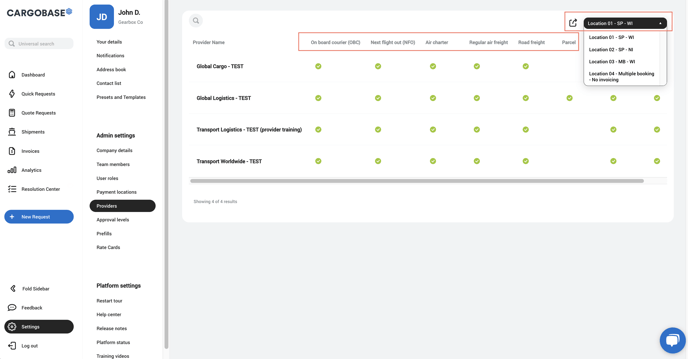
Providers
At Providers, you can see your provider's information, their status and freight mode service which they provide to your company.
-
Click
to download a detailed Excel document, and select the document type: Export all reviews or Export Providers list. -
You can also see the information based on Payment Location
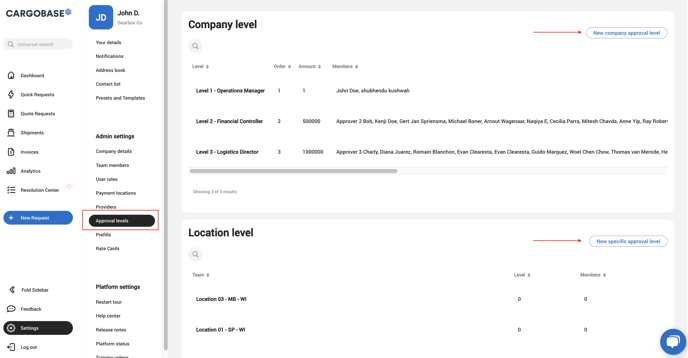
Approval Levels
As an administrator, you have permission to see and edit the approval levels of your company. You can edit the approval levels by Company or by Specific Payment Locations.
How to edit an approval level?
- Click at the desired approval level to modify.
-
Update the information, such as Name, Level Order, Amount, and Users.
-
Save the information by clicking Edit the Approval Level.
-
Click Delete to remove this specific approval level.
Delete actions will apply immediately and can create issues with the approval flow; this action should be done carefully.
%2012.27.34%20p.m..png?width=688&height=369&name=Captura%20de%20pantalla%202024-03-20%20a%20la(s)%2012.27.34%20p.m..png)
How to add an approval level?
-
Click New Company Approval Level or New Specific Approval Level to add, depending on your desired request.
-
Complete the information regarding this new approval level with the Name, Payment Location, Order, Amount, and Users.
-
Save the information by clicking Create New Approval Level.
%2012.28.50%20p.m..png?width=688&height=378&name=Captura%20de%20pantalla%202024-03-20%20a%20la(s)%2012.28.50%20p.m..png)
Rate Cards
Go to Rate Cards and validate the information of your company's active Rate Cards. The data available are names of rate card, freight mode, durability, origin, destination and status.
- You can use the Filter or Column functions on the top right to check the data.
- Select any rate card to see the details.
%203.01.38%20p.m..png?width=688&height=379&name=Captura%20de%20pantalla%202024-03-20%20a%20la(s)%203.01.38%20p.m..png)